Setting up the Apache Web Server on the system
Setting the apache web server with PHP and MySQL support.
Apache Web Server is an Open source web server known for it's stability on various platform and functioning.
Two Basic Method Explained below :
Apache Web Server On linux :
On linux, all the four Linux,Apache,MySQL,Php are called "LAMP". These four create a most secure server platform for web hosting. They also tell their way of Implementation like Linux -> Apache -> MySQl -> Php (in the last which do linking work for mysql.
 if you don't want the compiling, and have no time for doing these thing then
Xammp is made for you. just extract and start doing your programs.
Xampp : is pre-configured Apache,MySQL,PHP and perl program for Windows and linux.
Download it From : Xampp Official site
Let's start .....
I assume that you have installed the Linux distro on your box. If not then
Download Ubuntu or CentOS or any linux distro.
Setting the MySQL on the Linux :
First of all we need the source code of mysql
Download it from : MySQL.tar.gz
Note : you can use the .deb or .rpm files but this procedure for compiling from the source code.
After the Download completes
INSTALLING MySQL
Before installing MySQL, we need to create a user and group on the system that will run the mysql server.
if your system already have the mysql user group then skip this step.
# /usr/sbin/groupadd mysql
# /usr/sbin/useradd -g mysql mysql
Extract the Downloaded package into the /usr/local/
# cd /usr/local
# tar xvf /home/karan/Downloads/mysql-5.5.28-linux2.6-i686.tar.gz
( In your case, location of package can be different.)
Now create the shortcut of mysql directory
# ln -s /usr/local/mysql-5.5.28-linux2.6-i686 mysql
# cd mysql
# chown -R mysql .
# chgrp -R mysql .
# scripts/mysql_install_db --user=mysql
After completion
# chown -R root .
# chown -R mysql data
# cp support-files/my-medium.cnf /etc/my.cnf
# bin/mysqld_safe --user=mysql &
# cp support-files/mysql.server /etc/init.d/mysql.server
Error : if you receive this while configuring
------------------------------------------------------------------------
/usr/local/mysql/bin/mysqld: error while loading shared libraries: libaio.so.1: cannot open shared object file: No such file or directory
Then install the libraries
apt-get install libaio1 libaio-dev
yum install libaio
After the installation, let's start the mysql daemon
# /usr/local/mysql/bin/mysqld_safe &
Now, Let's check the status of mysql

----------------------------------------------------------------------------------------------------------------------------------------------------------------------------------------
Download the Apache Web Server : apache.tar.gz
Before Continue with installation, your need install the dependencies
Download Apr and apr-util from : Apr and Apr-utilApache Web Server is an Open source web server known for it's stability on various platform and functioning.
Two Basic Method Explained below :
- LAMP
- WAMP
Apache Web Server On linux :
On linux, all the four Linux,Apache,MySQL,Php are called "LAMP". These four create a most secure server platform for web hosting. They also tell their way of Implementation like Linux -> Apache -> MySQl -> Php (in the last which do linking work for mysql.

Xammp is made for you. just extract and start doing your programs.
Xampp : is pre-configured Apache,MySQL,PHP and perl program for Windows and linux.
Download it From : Xampp Official site
Let's start .....
I assume that you have installed the Linux distro on your box. If not then
Download Ubuntu or CentOS or any linux distro.
Setting the MySQL on the Linux :
First of all we need the source code of mysql
Download it from : MySQL.tar.gz
Note : you can use the .deb or .rpm files but this procedure for compiling from the source code.
After the Download completes
INSTALLING MySQL
Before installing MySQL, we need to create a user and group on the system that will run the mysql server.
if your system already have the mysql user group then skip this step.
# /usr/sbin/groupadd mysql
# /usr/sbin/useradd -g mysql mysql
Extract the Downloaded package into the /usr/local/
# cd /usr/local
# tar xvf /home/karan/Downloads/mysql-5.5.28-linux2.6-i686.tar.gz
( In your case, location of package can be different.)
Now create the shortcut of mysql directory
# ln -s /usr/local/mysql-5.5.28-linux2.6-i686 mysql
# cd mysql
# chown -R mysql .
# chgrp -R mysql .
# scripts/mysql_install_db --user=mysql
After completion
# chown -R root .
# chown -R mysql data
# cp support-files/my-medium.cnf /etc/my.cnf
# bin/mysqld_safe --user=mysql &
# cp support-files/mysql.server /etc/init.d/mysql.server
Error : if you receive this while configuring
------------------------------------------------------------------------
/usr/local/mysql/bin/mysqld: error while loading shared libraries: libaio.so.1: cannot open shared object file: No such file or directory
Then install the libraries
apt-get install libaio1 libaio-dev
yum install libaio
After the installation, let's start the mysql daemon
# /usr/local/mysql/bin/mysqld_safe &
Now, Let's check the status of mysql
----------------------------------------------------------------------------------------------------------------------------------------------------------------------------------------
INSTALLING Apache Web Server
----------------------------------------------------------------------------------------------------------------------------------------------------------------------------------------Download the Apache Web Server : apache.tar.gz
Before Continue with installation, your need install the dependencies
- APR : (Apache Portable Runtime Project)
- APR-Util
- PCRE : Perl Compatible Regular Expression
Download PCRE from : http://pcre.org/
After downloading the dependencies
catch the apr.tar.gz and compile and install it
# mkdir /opt/src
# cd /opt/src
# tar xvf /home/karan/Downloads/apr.tar.gz
# cd apr
# ./configure
# make
# make install
Now come to the apr-util.tar.gz
# cd /opt/src
# tar xvf /home/karan/Downloads/apr-util.tar.gz
# cd apr-util
# ./configure --with-apr=/usr/local/apr
# make
# make install
( Note : the location of package can be different.
tar xvf is used to decompress .tar.gz and
tar xjf is used to decompress .tar.bz2.
./configure using the default set --prefix=/usr/local )
Now PCRE ,
# cd /usr/local
# tar xvf /home/karan/Downloads/pcre.tar.gz
# CFLAGS='-2 -Wall' ./configure --prefix=/usr/local/pcre
# make
# make check
# make install
After that our pc is setup for installation of Apache Server now
# cd /usr/local/src
# tar xjf /home/karan/Downloads/httpd-2.4.3.tar.bz2
# ./configure --prefix=/usr/local/apache2 --enable-so --enable-rewrite --with-pcre=/usr/local/pcre
# make
# make install
After the completion of all,
# /usr/local/apache2/bin/apachectl -k start
Now open the browser and check the localhost

AH00558: httpd: Could not reliably determine the server's fully qualified domain name, using 127.0.1.1. Set the 'ServerName' directive globally to suppress this message
Fix : open the /usr/local/apache2/conf/httpd.conf
And " Servername localhost" in the last
Save and Restart apache
# /usr/local/apache2/bin/apachectl -k restart
Note : Some people may receive problems in loading gif formats in apache. This is due to the Case-sensitivity. if you receive same then check your files namings.
----------------------------------------------------------------------------------------------------------------------------------------------------------------------------------------
Download the php from : php.tar.bz2
after download ...
# cd /usr/local/src
# tar xjf /home/karan/Downloads/php.tar.bz2
We need php to include MySQL support and to link into Apache using DSO using the apxs utility.
# ./configure --prefix=/usr/local/php \
--with-mysql=/usr/local/mysql \
--with-apxs2=/usr/local/apache2/bin/apxs
(Error : xml2-config not found, install libxml2-dev )
# make
# make test
("make test" is Optional. for submitting the bug reports to the developers.)
# make install
Now after completing the installation, copy the php.ini-production from the php source directory
# cp ./php.ini-production /usr/local/php/php.ini
and open the /usr/local/apache2/conf/httpd.conf
add the following in the last of the file
AddType application/x-httpd-php .php .phtml .html
PHPIniDir "/usr/local/php"
and save it.
Now re-run the apache
# /usr/local/apache2/bin/apachectl -k restart
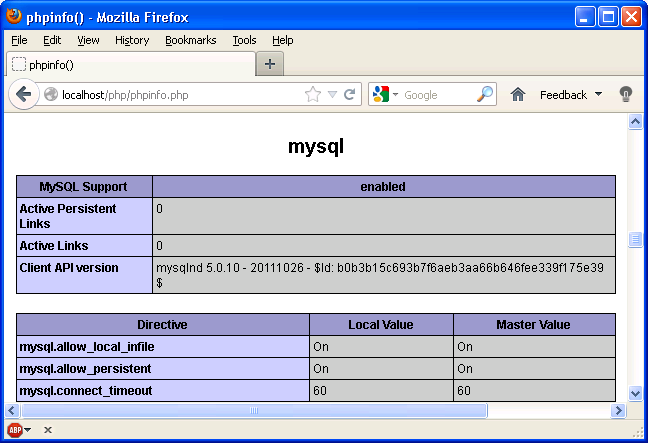
To test the PHP on the your web server
write the phpinfo.php file
<?php
phpinfo();
?>
you will get the screen like this ...

-------------------------------------------------------------------------------------------------------------------------------------
Automatically Startup on boot :
1. Move to rc3.d or rc5.d directory
# /usr/local/apache2/bin/apachectl -k restart
Note : Some people may receive problems in loading gif formats in apache. This is due to the Case-sensitivity. if you receive same then check your files namings.
----------------------------------------------------------------------------------------------------------------------------------------------------------------------------------------
INSTALLING PHP
----------------------------------------------------------------------------------------------------------------------------------------------------------------------------------------Download the php from : php.tar.bz2
after download ...
# cd /usr/local/src
# tar xjf /home/karan/Downloads/php.tar.bz2
We need php to include MySQL support and to link into Apache using DSO using the apxs utility.
# ./configure --prefix=/usr/local/php \
--with-mysql=/usr/local/mysql \
--with-apxs2=/usr/local/apache2/bin/apxs
(Error : xml2-config not found, install libxml2-dev )
# make
# make test
("make test" is Optional. for submitting the bug reports to the developers.)
# make install
Now after completing the installation, copy the php.ini-production from the php source directory
# cp ./php.ini-production /usr/local/php/php.ini
and open the /usr/local/apache2/conf/httpd.conf
add the following in the last of the file
AddType application/x-httpd-php .php .phtml .html
PHPIniDir "/usr/local/php"
and save it.
Now re-run the apache
# /usr/local/apache2/bin/apachectl -k restart
To test the PHP on the your web server
write the phpinfo.php file
<?php
phpinfo();
?>
you will get the screen like this ...

-------------------------------------------------------------------------------------------------------------------------------------
Automatically Startup on boot :
1. Move to rc3.d or rc5.d directory
# cd rc3.d or rc5.d
( Remove previous installed using ' Sudo rm -f S93sqlserver S94webserver ' )
2. # cd /etc/init.d
3. # cp /usr/local/apache2/bin/apachectl ./apache
4. # cp /usr/local/mysql/support-files/mysql.server ./mysql
In Case Ubuntu,Linux Mint or Debian System
#update-rc.d -f apache defaults
#update-rc.d -f mysql defaults
In case RedHat, Opensuse or rpm based
#chkconfig --add apache
#chkconfig --add mysql
And manually
# cd /etc/rc3.d or /etc/rc5.d
In Case Ubuntu,Linux Mint or Debian System
#update-rc.d -f apache defaults
#update-rc.d -f mysql defaults
In case RedHat, Opensuse or rpm based
#chkconfig --add apache
#chkconfig --add mysql
And manually
# cd /etc/rc3.d or /etc/rc5.d
# ln -s ../init.d/apache S94webserver
# ln -s ../init.d/mysql S93sqlserver
# ln -s ../init.d/mysql S93sqlserver
After the reboot, again check the 'localhost' or 127.0.0.1. Edit the preferred settings in httpd.conf
Apache Web Server On windows:
Setting the Apache with support of PHP and MySQL is very much easy in windows because here no compiling this time.
On Windows, the Four are called 'WAMP' - Windows Apache MySQL Php.
As said above in linux part, we can use the pre-setup All-in-one package like wamp and Xampp.

If you have no time,then i advice you to choose any of them.
Let go with our Manual Setup :
------------------------------------------------------------------------------------------------------------
Installing MySQL
------------------------------------------------------------------------------------------------------------
Download the MySQL from the Site : MySQL Community Server.msi
Actually, The main problem arise like error 1067 is just because of the white space that arise in the Directories.
And Run the Installer.
Choose "Custom" while the Installation

Note : The path of both files must contain no white space. As you can see i choose the path in image is "C:\MySQL" which contains no space. Change the path of Both "mysql server" and "Server data files".

After the Installation Complete,

It will launch the MySQL Instance Configuration Wizard. Click on finish.
Choose Configuration type any one you like "Detailed Configuration" or "Standard Configuration".
Then in Sever type choose "Server machine" or "Developer machine" or "Dedicated MySQL server machine" .
After that usage of database " According to your database need".
Next step, choose the drive to place the innoDB table space
Note : Same here choose the directory containing no space in between.

Choose the Concurrent connection according to your need.
Next leave the Networking option "default" and check the "Add firewall expectation for this port".
Then leave the Default character
After that in next Windows option, check the "Include bin directory in Windows Path" then click next
Set the root password of your MySQL
After all the settings you will get this screen

and it's done.
--------------------------------------------------------------------------------------------------------------
Installing Apache
--------------------------------------------------------------------------------------------------------------
Download the Apache Web server from : httpd-2.4.3-win32.zip or ssl( if needed)
Also download the php module for apache-2.4.3 from : php5apache2_4.dll-php-5.4-win32.zip (same above link).
Note : The new Apache version is compiled with VC10 ( Visual Compiler 2010), So you need to install the "Microsoft Visual C++ 2010 x86 Redistributable" update. Check in the Add or Remove program,if you have this update. if not then download it from here : Visual C++ 2010 .
let's Continue installation,
Open the httpd-2.4.3-win32.zip and extract the directory "Apache24" at C:/ or any path which doesn't contain any white space.
Now edit the file "httpd.conf" configuration file according to you pc configurations
Uncomment the SeverName or set it to your web domain (in image i set it to my local machine)

run the following :
httpd.exe and open the browser and fill the address bar "localhost". you will see this

Now press Ctrl + C to stop the httpd.exe then run
httpd.exe -k install
to install httpd.exe as a service.
And add the Apachemonitor.exe shortcut to the startup folder.
edit you web page directory : ( my web page directory is in d:/mywebsite,so )

And Apache is done.
--------------------------------------------------------------------------------------------------------------
Installing PHP
--------------------------------------------------------------------------------------------------------------
Download the PHP Thread Safe version : PHP VC9 thread safe x86
( Note : VC9 need Microsoft Visual C++ 2008 redistributable update ,check if you have it in your add or remove programs. or download it from here : Visual C++ 2008 )
Extract it to the C:\ and rename is to "php"
Now open the php directory and rename the "php.ini-production" to "php.ini"
Edit the php.ini config according to you need.
Open the php5apache2_4.dll-php-5.4-win32.zip and extact the php5apache2_4.dll from php 5.4.8 (choose different version according to you php) to the c:\php\
Open the C:\Apache24\conf\httpd.conf and add the following at the bottom.
# PHP Modules in Apache
LoadModule php5_module "c:/php/php5apache2_4.dll"
AddHandler application/x-httpd-php .php
# configure the path to php.ini
PHPIniDir "C:/php"
and save it.
Press Winlogo + R and type "services.msc" and run the "Apache2.4" service.
if all work well service will start.
Now save the phpinfo.php file in c:\apache24\htdocs\phpinfo.php
with following code :
<?php
phpinfo();
?>
and run localhost/phpinfo.php
you will get this :

Now, the only thing left is the linking part of PHP with MySQL. This is importent.
---------------------------------------------------------------------------------------------------------------
Linking MySQL with PHP
----------------------------------------------------------------------------------------------------------------
Open the php.ini file and look for doc_root and set it
doc_root = "d:\mywebsite" ; must be same with httpd.conf directory to webpage
then
session.save_path="c:\temp" ;directory must exist;
extension_dir = "c:\php\ext" ; FOR PHP 5 ONLY - path for extensions
And Uncomment the followings features(Note : ";" character is used for commenting.just remove it.)
extension=php_bz2.dll ; compression
extension=php_mbstring.dll ; Multibyte Support
extension=php_mysql.dll         ; mysql
extension=php_mysqli.dll        ; mysqli - Object Oriented
extension=php_pdo_mysql.dll ; Modern mysql,PHP Data Object(PDO)
extension=php_openssl.dll
after doing that Restart the Apache Web sever and Open phpinfo(); in your browser.
Now,On php information page,you will be able to see the mysql,mysqli,bz sections.
Now let us check the working via .php file ..
<?php

      mysql_connect('HOST','USR','PWD') or die(mysql_error());

    ?>
Fill the HOST =localhost if working on local machineUSR = username , pwd = password. Replace the following with your settings in MySQL's settings.And run it. if you receive any error. then check it.If not,Then start exploring the world of PHP. The official site provides the good documentation on every part of code. One simple and best program,made by Mr.Bill Weinman : sid.rar just open it and execute your SQL queries. if you want to use Phpmyadmin for executing the queries just place it in your website folder
and excute the main page.The config file used in phpmyadmin is config.sample.inc.php.
follow the instruction provided in browser interface.
Thanks for reading !
Subscribe to:
Post Comments (Atom)
No comments:
Post a Comment